Set up Semgrep Supply Chain with Jenkins UI
When running a CI job, the Jenkins UI Git plugin creates a detached HEAD ref by default. This causes Semgrep Supply Chain (SSC) to send a repository's branch name as HEAD to Semgrep AppSec Platform, instead of using the actual branch name. As a result, the Supply Chain findings may not display by default. This document explains how to set up Jenkins to fix this behavior for users of the Jenkins UI Git plugin.
Verify that there are findings to send to Semgrep AppSec Platform
These steps are optional, but it is recommended to perform the following procedure to verify that there are findings that Semgrep AppSec Platform is not displaying from your Jenkins job.
- Sign into Jenkins.
- Select the project that runs Semgrep Supply Chain scans.
- Click Build Now. A new job appears in your Project page.
- Click the queue number of the new job. This takes you to the Console Output page, displaying a log of your job.
- Take note of the total number of Supply Chain findings. Note that Supply Chain findings in the log are divided into Reachable and Unreachable findings.
- In Semgrep AppSec Platform, click Supply Chain.
- In the search bar, enter the name of the project or repository you scanned. This ensures that you see only findings for the scanned repository.
- Ensure that you see the total number of findings by selecting all checkboxes for Exposure and Transitivity. Note any discrepancy in findings.
Refer to the following section after verifying discrepancies between your CI job log and Semgrep AppSec Platform findings.
Set up SSC with Jenkins UI
To set up SSC with Jenkins UI, perform the following steps:
- Select the project that runs Semgrep Supply Chain scans.
- Click Configure.
- Under Source Code Management, ensure that Git is selected.
- Under Git > Additional behaviors click Add.
- From the drop-down box, click Check out to specific local branch.
- Enter the name of repository's mainline or trunk branch, such as
master.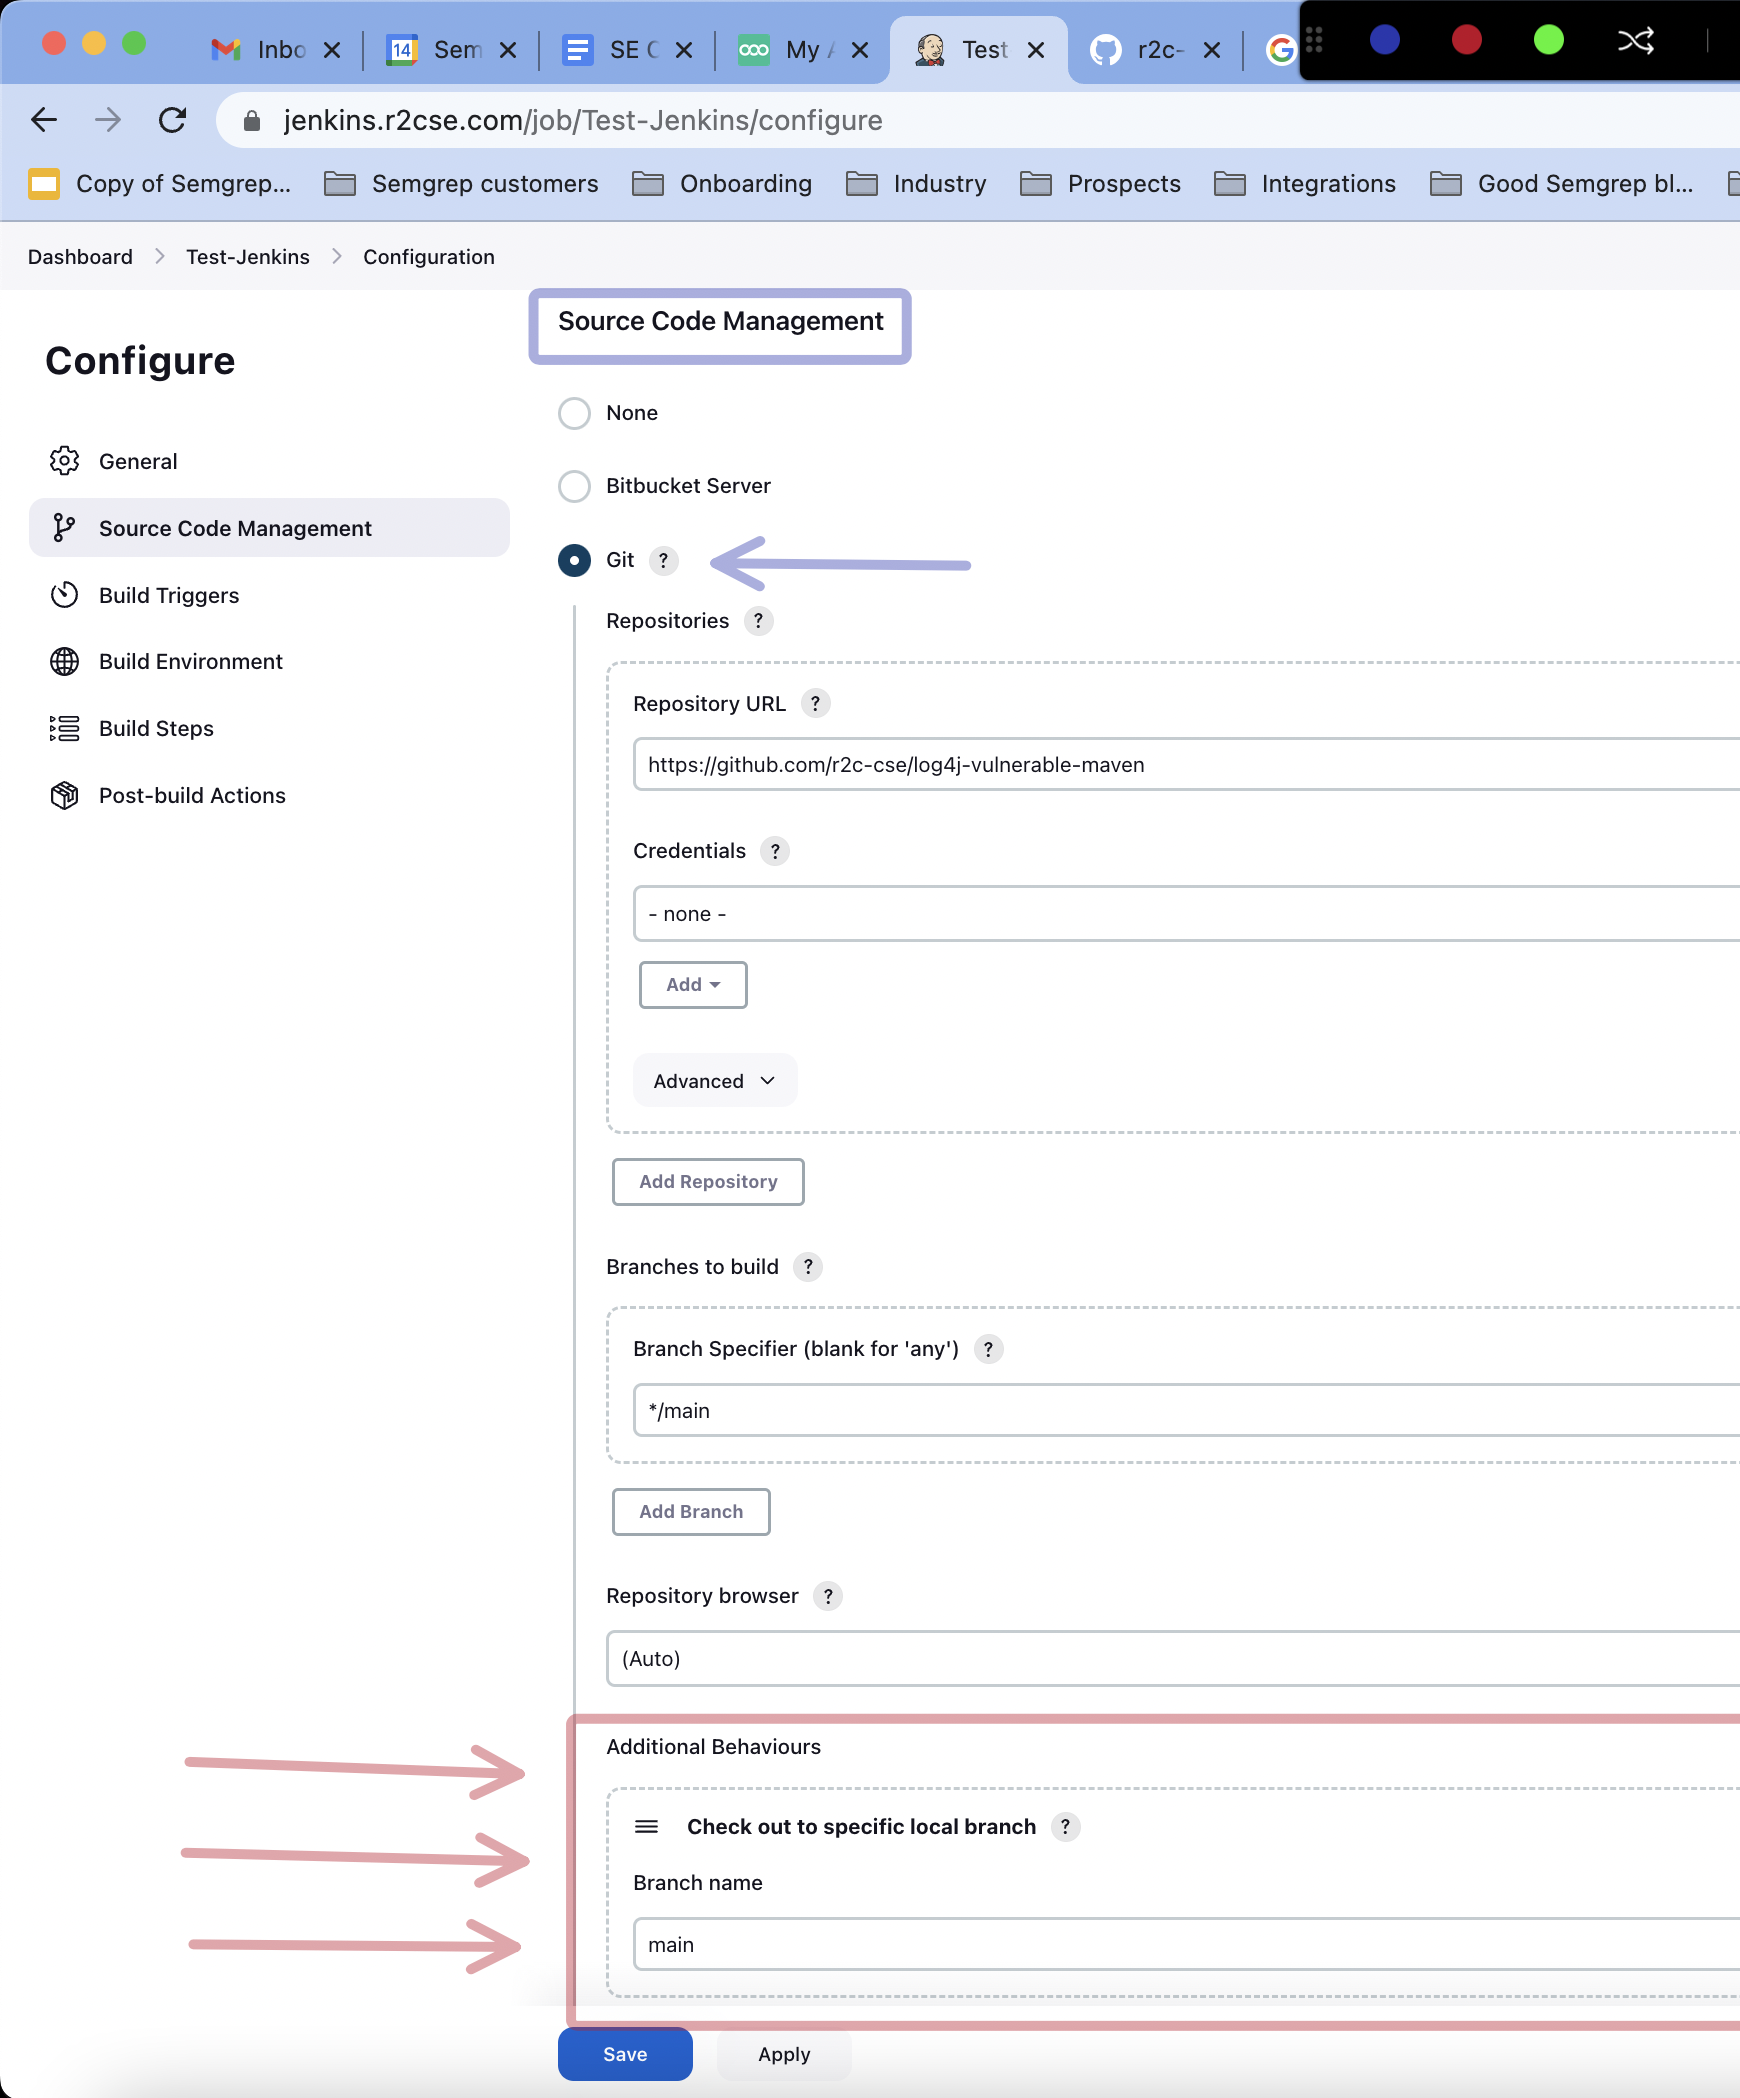
- Click Save.
- Optional: Click Build Now to test that your job can now send findings to Semgrep AppSec Platform.
You have successfully set up your Jenkins UI job to send findings to Semgrep AppSec Platform.
Not finding what you need in this doc? Ask questions in our Community Slack group, or see Support for other ways to get help.