Connect a source code manager
- You have gained the necessary resource access and permissions required for deployment.
- You have created a Semgrep account and organization.
Linking a source code manager provides the following benefits:
- Allows the Semgrep org membership to be managed by GitHub or GitLab.
- For GitHub users:
- Provides Semgrep access to post PR or MR comments.
- For GitHub Actions users: Enables you to add a Semgrep CI job to repositories in bulk.
- Allows you to scan and manage your Azure DevOps and Bitbucket projects in Semgrep AppSec Platform.
- Allows the Semgrep platform to generate hyperlinks to code in findings.
If your organization uses both GitHub and GitLab to manage source code, log in with the source code manager that you would prefer to use to manage Semgrep org membership. You can still scan repositories from other sources, including Azure DevOps and Bitbucket, though you will need to use a separate SSO provider to manage the authentication of your users in such cases.
The process to connect a source code manager depends on whether your SCM tool is cloud-hosted by the service provider, hosted on-premise, or hosted as a single tenant by the service provider.
Connect to cloud-hosted orgs
If you opted to scan a GitHub or GitLab repository when you initially signed in, you may have already performed these steps and can skip to Next steps.
- Azure DevOps Cloud
- Bitbucket Cloud
- GitHub Cloud
- GitLab Cloud
Azure DevOps Cloud
- Sign in to Semgrep AppSec Platform.
- Optional: If you have created more than one Semgrep account, select the account you want to make a connection for by clicking on the Navigation bar > Your account name > The account you want to connect.
- Go to Settings > Source code managers > Add > Azure DevOps.
- In the Connect your Azure DevOps Project dialog box, provide:
- The Name of your Azure DevOps Organization.
- The Name of your Azure DevOps Project. The name of your Azure DevOps organization and project can be seen in the project URL, for example
https://dev.azure.com/organization/project. - Your Access token. See User personal access tokens for information on generating a token.
- Click Connect to save and proceed.
- The Azure DevOps project is now listed under Source code managers. Click Test to verify that the new connection is installed correctly.
Bitbucket Cloud
- Sign in to Semgrep AppSec Platform.
- Optional: If you have created more than one Semgrep account, select the account you want to make a connection for by clicking on the Navigation bar > Your account name > The account you want to connect.
- Go to Settings > Source code managers > Add > Bitbucket Cloud.
- In the Connect your Bitbucket Workspace dialog box, provide:
- The Name of your Bitbucket Workspace
- Your Access token. Semgrep requires a workspace-level access token.
- Click Connect to save and proceed.
- The Bitbucket project is now listed under Source code managers. Click Test to verify that the new connection is installed correctly.
GitHub Cloud with GitHub SSO
These steps are for users that sign in to Semgrep through GitHub.
- Sign in to Semgrep AppSec Platform.
- Optional: If you have created more than one Semgrep account, select the account you want to make a connection for by clicking on the Navigation bar > Your account name > The account you want to connect.
- From the Navigation bar, click Settings > Source code managers.
- Click Add > GitHub.
- Review the permissions requested by Semgrep, then click Continue.
- Click the organization you want to install Semgrep on.
- Choose to authorize and install Semgrep for All repositories or Only select repositories.
- Click Install and authorize.
- After a successful link, you are signed out of Semgrep AppSec Platform automatically, as your credentials have changed after linking an organization.
- Sign back in to Semgrep AppSec Platform.
If you'd like to connect multiple GitHub orgs, use the instructions for GitHub Cloud with non-GitHub SSO.
GitHub Cloud with non-GitHub SSO
These steps are for users who:
- Sign in to Semgrep through a non-GitHub SSO provider
- Have connected to a GitHub org already, but want to add additional GitHub connections
You can connect to GitHub using Semgrep's GitHub app and one of the following: a personal access token or your individual GitHub account.
- Navigate to the following link: Semgrep GitHub app and install the Semgrep GitHub app onto the GitHub org you want to connect to.
- Sign in to Semgrep AppSec Platform using your non-GitHub SSO provider.
- From the Navigation bar, go to Settings > Source code managers.
- Click Add > GitHub.
- In the Connect your GitHub Organization modal, enter the name of your GitHub organization. Then, either:
- Enter a GitHub personal access token and click Connect.
- Click the Authenticate with GitHub button without providing a token.
- Your GitHub organization is now listed under Source Code managers. Click Test to verify that the new connection is installed correctly.
Alternatively, you can set up the Semgrep GitHub app. Then, contact Support and inform them which Semgrep account needs to be connected to the GitHub org. Support can help you finalize the connection.
GitHub Enterprise Cloud with data residency
If your GitHub Enterprise instance contains many orgs, you must choose an org among your accounts that acts as the owner of the Semgrep App. As the owner, this org controls the settings and permissions granted to the app. Throughout the setup process, ensure that you select this org consistently when prompted.
Perform the following steps to set up the connection:
-
Sign in to Semgrep AppSec Platform.
-
Optional: If you have created more than one Semgrep account, select the account you want to make a connection for by clicking on the Navigation bar > Your account name > The account you want to connect.
-
From the Navigation bar, click Settings > Source code managers.
-
Click Add > GitHub Enterprise.
-
In the Connect your GitHub Organization dialog that appears, provide:
- The Name of your GitHub Organization
- The URL used to access the GitHub instance
-
Add the Semgrep GitHub App:
- Under Enter GitHub information, indicate that you want to install the app on your Organization, and select the Organization name where the app is installed. If you have multiple GitHub organizations that you'd like to use with Semgrep, ensure that you select the Use for multiple GitHub orgs box.
- Under Select features to enable, indicate whether you would like to grant code access to Semgrep.
- Review the permissions requested by Semgrep.
- Click Register a Semgrep GitHub App. Semgrep asks if you'd like to be redirected to GitHub to continue creating the app. Click Continue to proceed.
- You are taken to your GHE instance and asked to name your app. You can choose whatever name you'd like, but Semgrep recommends that you name it something that indicates that this is the Semgrep GHE app.
- After you name your app, choose the GHE org you want to install it on.
- Select the org, then click Install.
- Wait for the installation to complete. When done, you are redirected to Semgrep.
- Verify the installation by navigating to Settings > Source code managers. Ensure that the entry for your GitHub organization shows a Connected badge.
- In GHE, you should see the app listed as installed on the GitHub Apps page.
- You can click Configure to choose the repositories to which the app has access. Additionally, you can go to App settings to customize the permissions granted to the app.
-
If you have additional GHE orgs you'd like to add, you can do so by repeating the previous steps 1-6.
At this point, you've successfully installed the GHE Semgrep App on the owner GHE org. In the future, other members of your GHE instance can install the app on their GHE orgs using the public link if they have the proper permissions. You can get the public link from GHE by going to GitHub Apps > App settings.

Install the app for subsequent GitHub orgs
You can install the Semgrep app onto additional GitHub orgs at any time. To do so:
- Go to the public link for the app. Click Install.

- Choose the GitHub org to which you want the app installed, and click Install.

- In the popup confirmation message, click Install.

- The GitHub org should now be listed under Source code managers.
You have successfully connected Semgrep to your GitHub organization.
GitLab Cloud
- Create a PAT by following the steps outlined in this guide to creating a PAT. Ensure that the PAT is created with the required
apiscope. - Sign in to Semgrep AppSec Platform.
- Optional: If you have created more than one Semgrep account, select the account you want to make a connection for by clicking on the Navigation bar > Your account name > The account you want to connect.
- Click Settings > Source Code Managers > Add > GitLab Cloud
- Enter the personal access token generated into the Access token field.
- Enter your GitLab group's name into the Name of your GitLab Group field. If your repositories are organized in subgroups, you only need to provide the name of the top-level group.
- Optional, but recommended: if you have multiple GitLab groups in your GitLab account, create a source code manager per group. Repeat steps 1, 3-4 for each GitLab group.
- The GitLab groups are now listed under Source code managers. Click Test to verify that the new connection is configured correctly.
You have successfully connected an org in Semgrep AppSec Platform with an organization in your source code management tool.
Connect to on-premise orgs and projects
- Bitbucket Data Center
- GitHub Enterprise Server
- GitLab Self-Managed
Bitbucket Data Center
- Create an HTTP Access Token for your project following the steps outlined in Bitbucket Data Center documentation. Ensure that the access token is created with
PROJECT_ADMINpermissions. - Copy the token for use in the next steps.
- Sign in to Semgrep AppSec Platform.
- Optional: If you have created more than one Semgrep account, select the account you want to make a connection for by clicking on the Navigation bar > Your account name > The account you want to connect.
- Go to Settings > Source code managers, and click Add > Bitbucket Data Center.
- In the Connect your Bitbucket project (key) dialog box, provide:
- The Name of your Bitbucket project (key). This must be the project key, which you can find by navigating to
<YOUR_BITBUCKET_DATA_CENTER_BASE_URL>/projects. - The URL to access your installation of Bitbucket Data Center; this is your fully qualified domain name.
- The Access Token that grants Semgrep permission to communicate with your project. Semgrep expects an HTTP access token with
PROJECT_ADMINpermissions.
- The Name of your Bitbucket project (key). This must be the project key, which you can find by navigating to
- Click Connect to save and proceed.
- The Bitbucket project is now listed under Source code managers. Click Test to verify that the new connection was installed correctly.
- To enable merge request comments, click Incoming webhooks.
- Optional: Click Auto scan to onboard all current and future repositories under your project to Semgrep Managed Scans.
GitHub Enterprise
This section is applicable to users on a GitHub Enterprise Server plan.
The Semgrep App for GitHub Enterprise (GHE) creates a connection between Semgrep and orgs in your GHE deployment. There are two primary installation steps:
- Install the Semgrep App for the first time using the GHE organization (org) that "owns" the app.
- Install the app for additional GHE orgs.
Initial Semgrep App installation
If your deployment contains many orgs, you must choose an org among your accounts that acts as the owner of the Semgrep App. As the owner, this org controls the settings and permissions granted to the app.
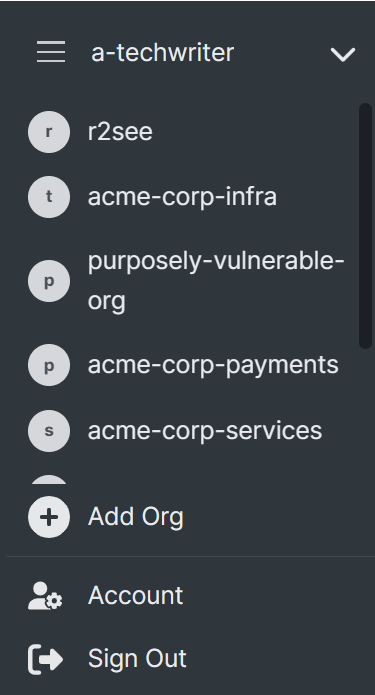
Ensure that you have selected the intended owner by viewing the account name in the navigation bar:
Choose another account by clicking the account name and selecting an account from the drop-down box. Then, perform the following steps to set up the connection:
- Sign in to Semgrep AppSec Platform.
- Click Settings > Source code managers > Add > GitHub Enterprise.
- In the Connect your GitHub Organization dialog box, provide:
- The Name of your GitHub Organization
- The URL to access your deployment
- Click Connect to save your changes.
- In the Add GitHub App page that you're redirected to, ensure that:
- You've selected Organization.
- The GitHub Organization name is populated; if not, enter the name of your org.
- You've selected the Use for multiple GitHub orgs (Enterprise-public app) checkbox.
- Select the features you'd like enabled. Enabling PR comments, Multimodal recommendations, and Semgrep Managed Scans requires you to grant Semgrep Code Access, while enabling only PR comments does not.
- Review the permissions for the app; as the app owner, note that you can change these permissions later.
- Click Register GitHub App to proceed.
- You are taken to your GHE instance and asked to name your app. You can choose whatever name you'd like, but Semgrep recommends that you name it something that indicates that this is the Semgrep GHE app.
- After you name your app, choose the GHE org to which you want it installed.
- Select the org that you want to act as the owner of the app, and click Install.
- Wait for the installation to complete. When done, you will be redirected to Semgrep.
- Verify the installation by navigating to Settings > Source code managers. Ensure that the entry for your SCM shows a Connected badge.
- In GHE, you should see the app listed as installed on the GitHub Apps page.
 You can click Configure to choose the repositories to which the app has access. Additionally, you can go to App settings to customize the permissions granted to the app.

- If you have additional GHE orgs you'd like to add, you can do so by repeating steps 2-15.
At this point, you've successfully installed the GHE Semgrep App on the owner GHE org. In the future, other members of your GHE instance can install the app on their GHE orgs using the public link if they have the proper permissions. You can get the public link from GHE by going to GitHub Apps > App settings.
Install the app for subsequent GHE orgs
You can install the Semgrep app onto additional GHE orgs at any time. To do so:
- Go to the public link for the app shared with you by your admin. Click Install.
- Choose the GHE org to which you want the app installed, and click Install.
- In the popup confirmation message, click Install.
- The GHE org should now be listed under Source code managers.
You have successfully connected Semgrep to your GitHub Enterprise Server.
GitLab Self-Managed
This section is applicable to users with subscriptions to any GitLab self-managed plan.
Connect Semgrep and GitLab Self-Managed accounts by creating a PAT and providing it to Semgrep using Semgrep AppSec Platform:
- Create a PAT by following the steps outlined in this guide to creating a PAT. Ensure that the PAT is created with the required
apiscope. - Sign in to Semgrep AppSec Platform.
- Optional: If you have created more than one Semgrep account, select the account you want to make a connection for by clicking on the Navigation bar > Your account name > The account you want to connect.
- Click Settings > Source code managers > Add > GitLab Self-Managed and enter the personal access token generated into the Access token field.
- Enter your GLSM base URL into the URL field.
- Enter your GitLab group's name into the Name of your GitLab Group field. If your repositories are organized in subgroups, you only need to provide the name of the top-level group.
- If you have multiple GitLab groups in your GitLab account, you need to create a source code manager per group. Repeat steps 1, 3-5 for each GitLab group.
- The GitLab groups are now listed under Source Code managers. Click Test to verify that the new connection is installed correctly.
Next steps
- Optional: See SSO authentication to set up user management through SSO.
- You are ready to scan your org's repositories with Semgrep.
Not finding what you need in this doc? Ask questions in our Community Slack group, or see Support for other ways to get help.