SAML SSO with Google Workspace
This article describes how to set up SAML Single Sign-on for Semgrep AppSec Platform with Google Workspace, including how to set up the necessary attribute mappings.
- Guided setup (beta)
- Legacy manual configuration
This article describes how to set up SAML Single Sign-on for Semgrep AppSec Platform with Google Workspace, including how to set up the necessary attribute mappings.
Ensure that you are an admin for both your Semgrep deployment and your Google Workspace account.
Google Workspace configuration
- Set up a custom SAML app in Google Workspace. The default Name ID is the primary email, and this value is optimal for use with Semgrep AppSec Platform.
- When you reach the Add mapping step of the instructions to set up a custom SAML app, add the attribute statements that Semgrep AppSec Platform requires:
Name Value id user.loginoruser.emailemail user.emailfirstName user.firstNamelastName user.lastName
Semgrep configuration
- Sign in to Semgrep AppSec Platform.
- Go to Settings > Access > Login methods. In the Single sign-on (SSO) section, provide a valid Email domain, then click Initialize.
- The Configure Single Sign-On dialog appears to guide you through the remaining configuration steps. Begin by selecting Custom SAML.
- Follow the instructions provided on the subsequent Configure Single Sign-On dialog pages to complete this process. When you've completed the required steps, use Test sign-in to test the connection.
- Once test sign-in has passed, close the test page. Verify that the Connection details shown on the Connection activated screen are correct and close the dialog.
- Verify that the Connection status is now active under the Single sign-on (SSO) section in Semgrep AppSec Platform.
- To use the new connection, log out of Semgrep, then log back in using SSO.
Follow these steps:
- Set up a custom SAML app in Google Workspace. The default Name ID is the primary email, and this value is optimal for use with Semgrep AppSec Platform.
- When you reach the Add mapping step of the instructions to set up a custom SAML app, add the two attribute statements that Semgrep AppSec Platform requires:
nameandemail.- The attribute mapped to
emailshould be the primary email. - The attribute mapped to
nameshould be some form of the user's name. You can use a default attribute like the user's first name, or create a custom attribute for their full name.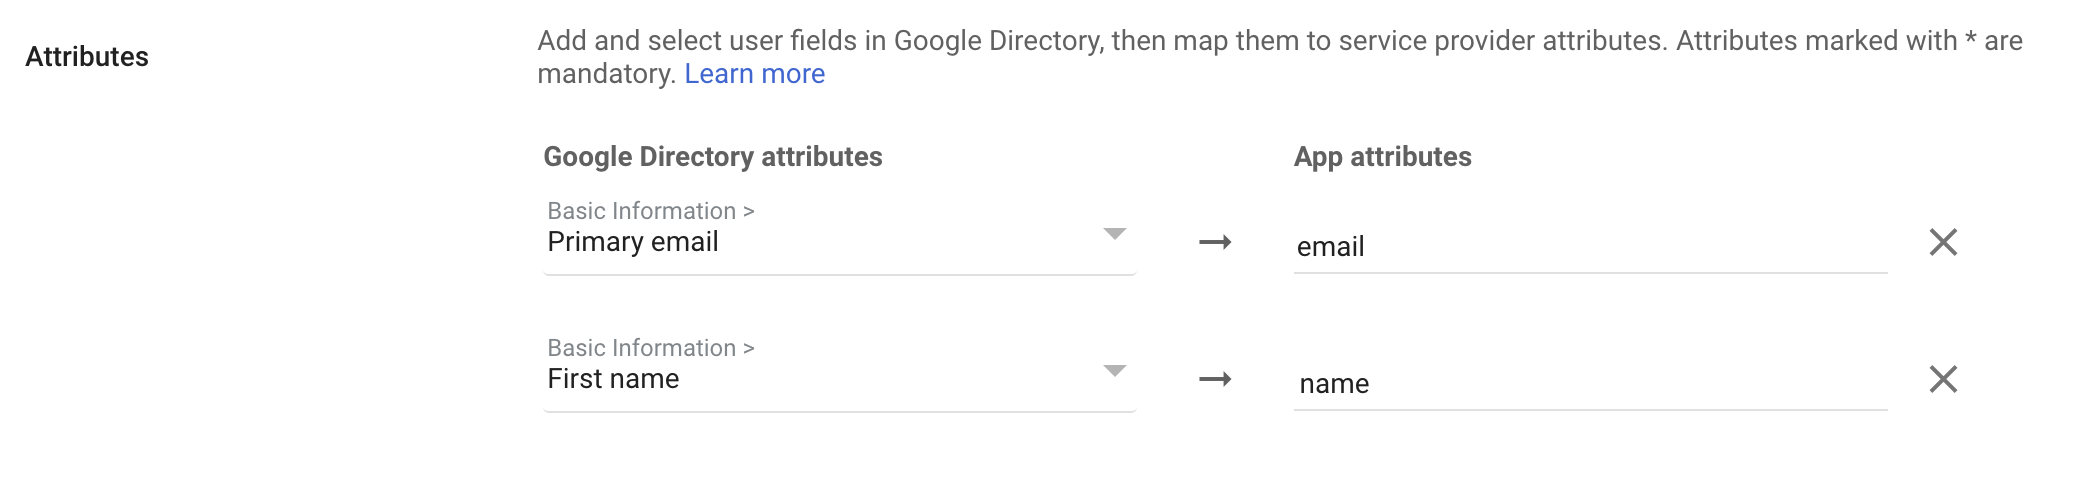
- The attribute mapped to
- Sign in to Semgrep AppSec Platform.
- Navigate to Settings > Access > Login methods.
- Click Add SSO configuration and select SAML2 SSO.
- Provide a Display name and your Email domain.
- Copy the SSO URL and Audience URL (SP Entity ID), and provide them to Google Workspace as the ACS URL and Entity ID, respectively.
- Copy your IDP metadata, including the SSO URL and Entity ID and the x509 certificate, from the custom SAML app in Google Workspace.
- Enter these in Semgrep AppSec Platform as the IdP SSO URL and IdP Issuer ID values respectively, and upload or paste the X509 Certificate.
- Click Save to proceed.
Not finding what you need in this doc? Ask questions in our Community Slack group, or see Support for other ways to get help.