Use the Semgrep rule schema to write rules in VS Code
You may already be familiar with writing rules in the Semgrep Editor. However, if your IDE of choice is VS Code and you'd like to write Semgrep rules there, using the Semgrep rule schema will provide a richer editing environment, allowing VS Code to understand the shape of your rule's YAML file, including its value sets, defaults, and descriptions (reference).
Writing rules locally in your IDE is also helpful for iteratively testing them against an entire local repository, as opposed to just a snippet of test code.
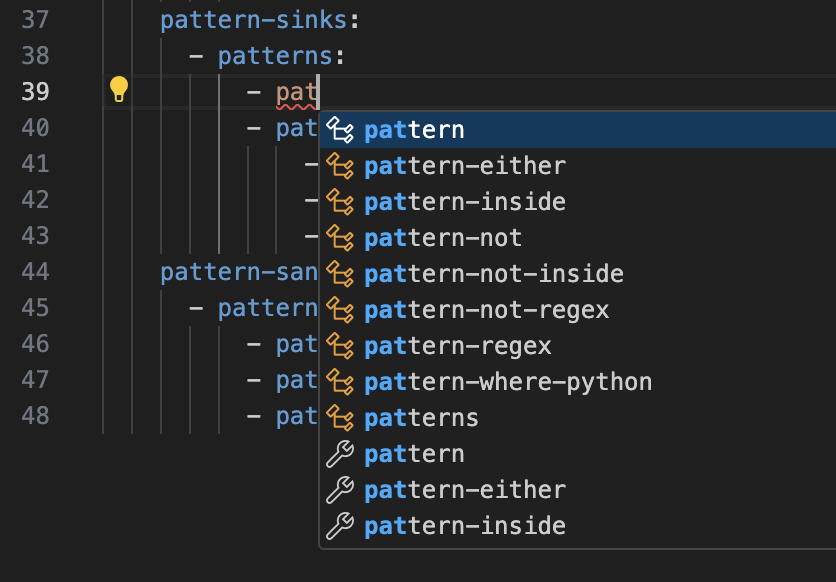
When the schema is set up, auto-completion operates in your VS Code IDE just as it does in the Semgrep Editor when writing rules:
Add the Semgrep rule schema in VS Code
Adding the Semgrep rule schema in VS Code requires two steps:
- Install the YAML Language Support extension by Red Hat
- Associate the Semgrep rule schema
Install the YAML Language Support extension by Red Hat
You can install the "YAML" extension authored by "Red Hat" directly in VS Code or by going to the Visual Studio Marketplace and installing it from there. In VS Code, go to the Extensions pane and search for yaml. This should yield the correction extension as the top result. However, please verify that you are installing the correct extension by ensuring it is the same as this one.
Associate the Semgrep rule schema
Once the extension is installed, associate the Semgrep rule schema with the Semgrep YAML rule definitions you are working on in VS Code using one of following methods:
- Directly in the YAML file
- Using
yaml.schemasin your VS Codesettings.jsonfile
We recommend taking a look at the extension overview section on associating schemas to gain a preliminary understanding before proceeding.
Associate a schema directly in the YAML file
To associate the schema directly within a Semgrep YAML rule file, include the following line at the top of the file:
# yaml-language-server: $schema=https://json.schemastore.org/semgrep.json
The drawback to this method is that it must be done independently for each YAML rule file.
Associate a schema to a glob pattern via yaml.schemas
Before proceeding, we recommend reading the extension overview as a supplement to this article to better understand how YAML schemas are handled by the extension.
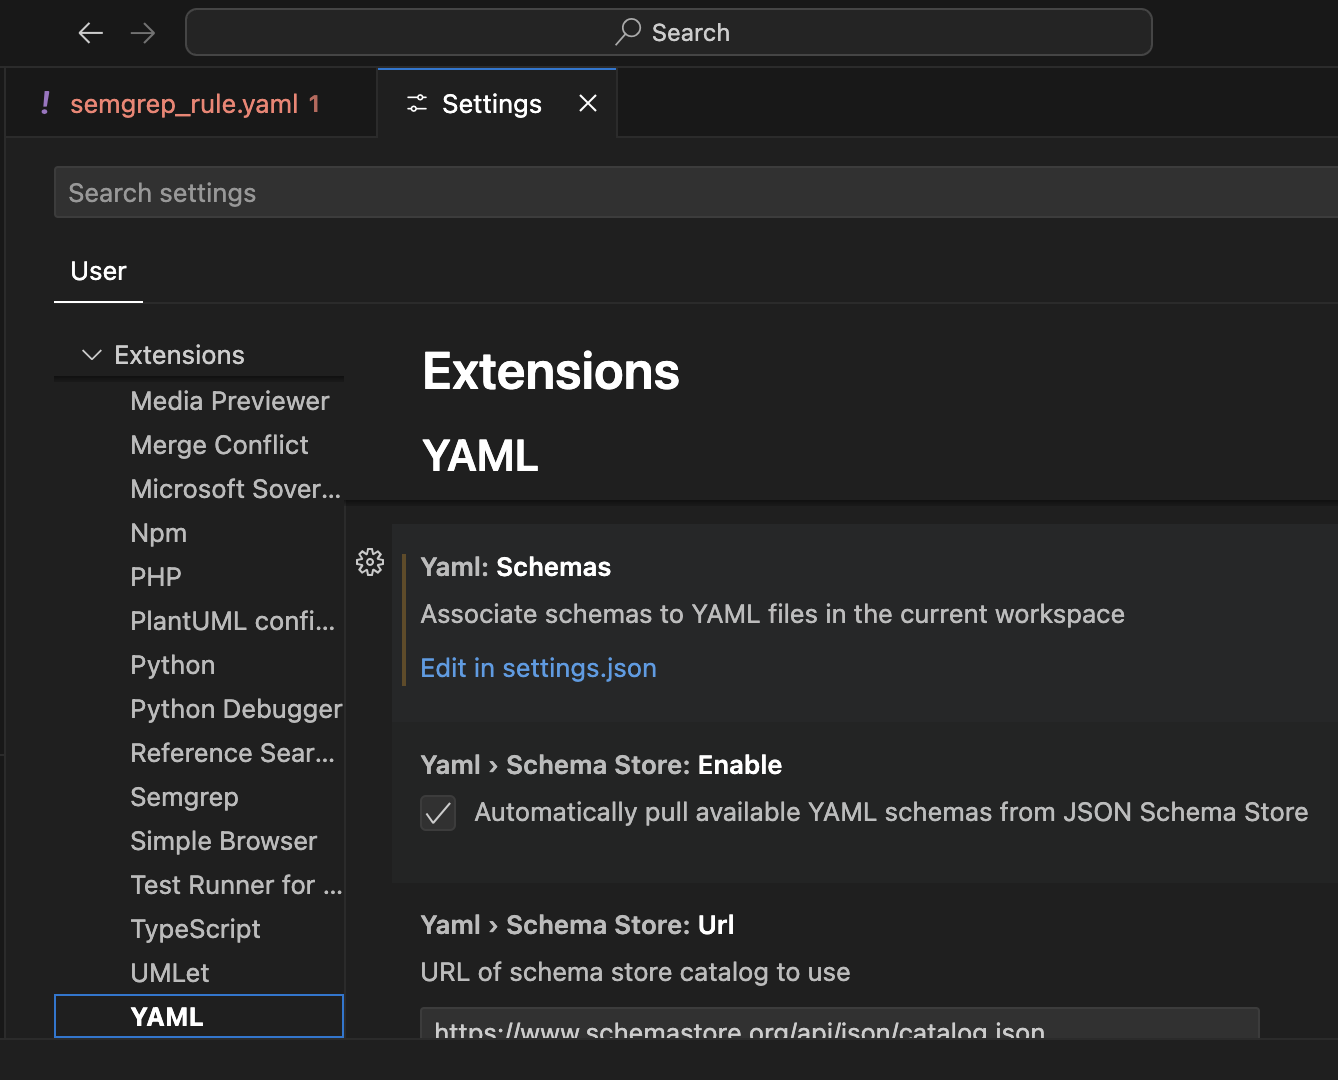
To associate the Semgrep rule schema via yaml.schemas in your VS Code settings.json file (on macOS), go to:
Code -> Settings -> Settings -> Extensions -> YAML
In the YAML extension settings, scroll down to Yaml: Schemas and click Edit in settings.json, as shown below:
This opens the settings.json file with an empty yaml.schemas object ready to be defined. For example, consider the following yaml.schemas definition:
"yaml.schemas": {
    "https://json.schemastore.org/semgrep.json": "Downloads/semgrep_rules/*.yaml"
}
This associates the schema defined on the left side of the colon (:) with files matching the glob pattern on the right. The glob pattern matches any .yaml file located in a directory structure that matches Downloads/semgrep_rules/. The desired glob pattern differs for varying operating systems and should reflect where you are storing Semgrep YAML rule files.
After completing the configuration for yaml.schemas, open a Semgrep rule YAML file to verify that a notice shows at the top similar to this one:
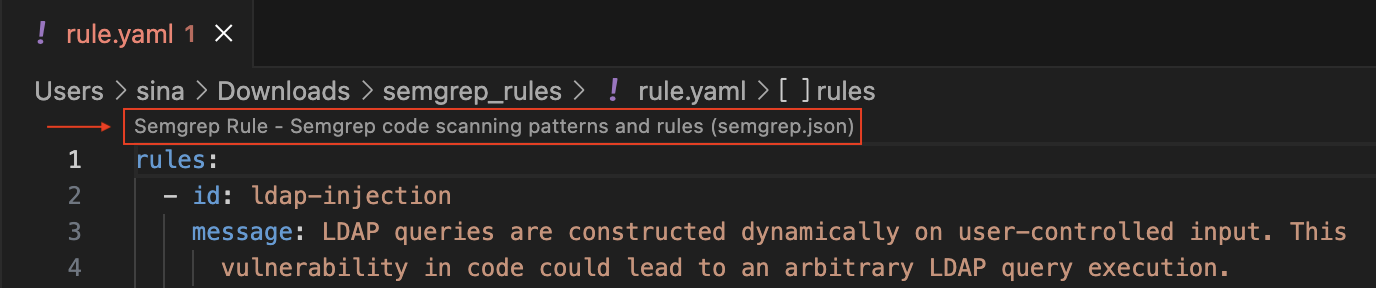
This indicates that you've successfully associated the Semgrep rule schema with your Semgrep rule YAML file(s).
Not finding what you need in this doc? Ask questions in our Community Slack group, or see Support for other ways to get help.